
Pastéis de Nata: Portuguese Custard Tarts
- Nov 6, 2018
- 7 min read
Updated: Apr 14, 2019
Written by: Jeremiah Duarte Bills, quarter-finalist on 'The Great American Baking Show'

Pastéis de nata or pastéis de Belém are the most famous and iconic of all Portuguese pastries. Originating in the 18th century at the Jerónimos Monastery in the Belém neighborhood of Lisbon, the original recipe developed by monks is a well guarded secret. However, because of its popularity, there are many wonderful recipes which come close to the original. Which recipe to choose? I did the research for you! I studied over a dozen recipes in Portuguese and English comparing ingredient ratios and techniques to bring you a pastel de nata that matches my memory of the perfect tart. To be honest, my favorite version isn’t in Lisbon but in Porto at the Confeitaria Petulia. Their custard was richer in egg yolks and was an unforgettable experience! I combined the most common and popular ingredient ratios with more egg yolks to create my version which will hopefully transport you to Lisbon (or Porto)!
Why are they called cream (nata) tarts when there isn’t any cream? My understanding is that the finished custard is so rich and smooth just like cream.
I have included a recipe to make your own puff pastry but you can also use store bought pastry. I would recommend taking the time to make the pastry if you can. It can be done days before and is incredibly rewarding. Many Portuguese recipes use margarine but I do not care for the flavor. If you use a high quality European style butter if will definitely outshine any store bought pastry and the flavor will have you dancing the chamarrita!
Level: Difficult Serves: 36 (1 tart per person)
Prep and Cook Time: 4 - 4.5 hrs/1 - 1.5 hrs with store-bought pastry
Ingredients:
Custard: (adapted from Chefe Silva and Neuza Costa)
242 grams (1 cup) whole milk
30 grams (2 tbsp) all-purpose flour
125 grams (0.5 cup) water
250 grams (1.25 cups) sugar
2 large strips lemon zest
1 cinnamon stick
100 grams (5 large) egg yolks
0.25 tsp fine sea salt
cinnamon for sprinkling
powdered sugar for sprinkling
Puff pastry: (adapted from Rose Levy Beranbaum)
Note: This recipe makes twice as much as needed for the custard. I believe if you’re going to go through the work, make extra in order to have some left over. It keeps very well in the fridge or freezer. Alternatively, you can double the custard amount to make 72 tarts.
454 grams (2 cups) unsalted European style (high fat) butter (preferably organic, straight from the fridge cut into small cubes)
454 grams (3 cups) unbleached all-purpose flour (I recommend King Arthur)
236 grams (1 cup) water, room temperature
11 grams (2 tsp) lemon juice
1 tsp fine sea salt
OR 490 grams (1.1 lb) store-bought puff pastry sheets
Directions:
Homemade puff pastry (if making your own):
Measure out all ingredients.
Place 60 grams (4 tbsp) of flour aside and 60 grams of butter aside. Then combine the 60 grams of flour with the remaining butter [to be used in step #3] and in a separate bowl combine the 60 grams of butter with the remaining flour [to be used in step #7].
Place the butter with the small amount of flour into a stand mixture fitted with the paddle attachment.
Beat on low (speed 1) to smooth out the butter and incorporate the flour. Scrape down as necessary. Be careful to not whip air into the butter.
Place butter into a ziplock bag that measures roughly 6 inches by 6 inches. You can also make a pouch out of parchment paper.
Once butter is in bag, seal and smooth to an even thickness. Place in the refrigerator while making the dough.
Get the large bowl of flour with the small amount of butter from step #2. Using your fingertips, rub the butter into the flour until well incorporated. Sprinkle salt over the mixture and add to the mixing bowl that you used to mix the butter (there is no need to clean the bowl).
Add the water and lemon juice, then mix on low using the dough hook attachment until ingredients begin to come together.
Increase speed to medium low (speed 4) until the dough cleans the sides of the bowl.
Dump dough onto counter and knead gently to finish bringing the dough together. Do not overwork dough or it will become tough when rolling and will affect your finished product.
Cover the dough and let it rest at room temperature for 20 minutes.
Using your fingers, stretch and then roll the dough into a 7 to 8 inch square.
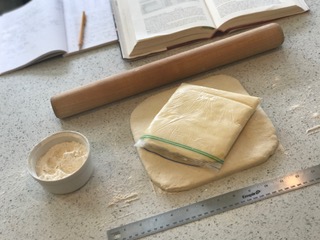
Place the butter pouch diagonally on the dough square, making sure it fits inside. Using a ruler or the back of a knife, mark the outline of the butter on the dough and then set the butter aside.
Roll out the dough flaps on the outside of your marked edge to extend them.
Cut butter free from ziplock pouch and place back onto dough.
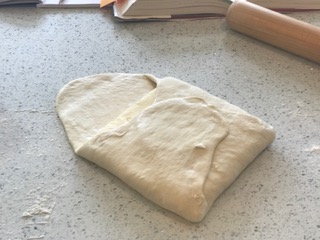
Stretch and place each corner of dough over the butter block completely encasing it in dough.
Roll out dough with seam side up until it measures 8 inches by 15 inches. Use flour to dust the counter conservatively when rolling. You do not want the dough to absorb too much flour though.
Brush off excess flour and fold dough into thirds like a business letter. Make sure your corners are square. If they are rounded, use your ruler or bench scraper to reshape them.
Turn folded dough so that the closed end faces the left and the open end the right.
Roll again to a rectangle 8 by 15 inches and perform another letter fold brushing off any excess flour. Make sure to use a ruler or bench scraper to constantly keep your lines straight and edges square. If at anytime, the butter gets too warm or the dough becomes hard to handle place it in the refrigerator for 5 to 10 minutes. A cool counter top is preferable when working with puff pasty.
Indent the dough with two knuckle prints (as a mark of two turns), wrap in plastic wrap, and place in the refrigerator for 30 minutes. Do not leave it longer or the butter will loose its plasticity and break while you roll. If you happen to leave it longer, let it sit out for a short time to slightly soften.
Place dough with the closed side to your left and roll to 8 by 15 inches.
Perform another letter fold. Mark with 3 knuckle prints.
Wrap in plastic wrap and refrigerate for 30 minutes.
Roll the dough and fold one more time for a total of 4 turns (For this recipe, I use only 4 turns to prevent the pastry from puffing too much and becoming thick while baking. Generally, puff pastry will have up to 7 turns).
Cut dough in half. You will only need half for the amount of custard in this recipe. Alternatively, you can use the full amount of pastry and double the custard amount.
Refrigerate for 30 minutes.


Custard:
Measure all ingredients.
Whisk two tablespoons of the milk with the flour.
Slowly add the remaining milk while whisking constantly to avoid lumps.
Pour milk and flour mixture into a medium sauce pan and bring to a boil while whisking constantly. It will thicken as it reaches a boil. Turn off the heat once boiling.
In another medium saucepan, combine the water, sugar, lemon zest, and cinnamon stick. Turn up heat to medium/high to high stirring until the mixture comes to a boil. Once it reaches a boil, do not stir. Continue to boil the mixture until it reaches 230 degrees F.
Slowly drizzle syrup into milk mixture while constantly whisking.
Strain mixture through a fine mesh strainer to remove any lumps, lemon zest, and cinnamon stick. Leave to cool until slightly warm or room temperature.
Once the milk mixture has cooled, whisk yolks and salt together in a separate, large bowl.
Pouring the milk mixture little by little, slowly whisk it into the yolks.
Place finished custard into a measuring cup with a spout, small pitcher, or depositor. You may store in the refrigerator covered until needed. Make sure to bring it back to room temperature before baking.


Rolling puff pastry and baking:
Roll homemade or store-bought dough into a rectangle 1/4 of an inch thick.
Lightly dampen the surface of the dough. Starting from the long end, roll the dough into a roll (like a jelly roll). The roll pictured above measures 9 inches long with a 2 inch diameter.
Wrap in plastic wrap and refrigerate for 2 hours until very firm.
Depending on the size of your tins, cut the dough into slices and place in each tin (use a mini-muffin pan if you don't have pastel de nata tins) I cut my slices 2/8 of an inch thick to fit my traditional tins.
Place tins in refrigerator until dough has firmed again.
Using your thumb, gently press the center of the dough into the base of the tin and the rest of the dough against the sides, until it’s very thin (1/8 - 1/16 of an inch). It will rise higher than the ridge of the tin.
Refrigerate for 20 to 30 minutes to relax the dough and firm up the butter.
Preheat oven to 500 degrees F. Place rack in the lower third of the oven.
Pour or deposit custard into lined tins, filling them 75% full.
Bake for 15 to 20 minutes until pastry is golden brown and custard has browned/blackened in spots, which is the traditional look of these pastries.
Using tongs, remove pastries from the tins and cool on a wire rack.
Let cool until no longer hot, but still warm. Sprinkle with cinnamon and or powdered sugar.
Pastéis de nata are best eaten the same day they are baked,
or the next day after being warmed up!


Tips and Troubleshooting:
Always test 1 or 2 pastries first to see how your oven affects the finished product.
If the visible pastry burns, but the custard doesn’t brown, you need to lower your baking rack in the oven.
If the base of your pastry burns, place your tins on 2 stacked sheet pans instead of 1.
If your custard won’t brown/blacken, broil briefly before serving.
If the tops burn, but the base/sides aren’t cooked, try a lower oven temperature or lower the baking rack.
If your pastry shrinks, your pastry dough roll was too narrow, you didn’t let the dough rest enough while rolling and lining the tins, or the dough wasn’t cold enough before baking.
Keep dough cold at all times.
You can store lined tins in the refrigerator or freezer to fill and bake when needed.


Comments